Tuesday, July 2, 2019

DIY USB KVM selector using audio selector. (1 keyboard -> 2 computer)


    The simplest hardware solution to control 2 computers with 1 set of mouse and a keyboard.
For this project, you would need.
  • 4 pole 3-way rotary selector.
  • 2x USB Cable (Printer cable)
  • Female USB connector. (from old USB Hub)
  • Small plastic box (I use dental floss box).
  • A working USB Hub for connecting Mouse and Keyboard.


     The reason you will need a 3-way selector while only use 2 of them is that this kind of selector will momentary short between adjacent position while turning so you should use a 3-way selector while leaving the center position unconnected.
    I use twist-pair cat5 wire for connection.

Wiring diagram


    USB female connector can be harvested from a dollar store USB Hub.


Finished product.
Two USB cables (white) are connected to both computers, PC or Mac.
Connect a USB hub to the female USB connector.
Connect mouse & keyboard to the USB Hub.


    If you are using a USB 2.0 hub you can also plug a USB Flash drive to share between computers as well, Just remember to eject the flash drive before switching.


Floppy drive themed CF Card reader for Retro Gaming PC


    Recently, a retro computer gaming pc is making a come-back, many of us are digging a two-decade-old PC out of a junk pile to make a DOS gaming PC only to found out that while most of the electronic are mostly usable, an old hard drive usually didn't last through these decades.

    Sourcing old IDE hard drive also possible but another more convenient is to use Compact Flash to IDE adaptor which not only serves as an HDD replacement but also make copying file from a modern system much easier by plugging it in a card reader.

    Many of the cheap converters come for internal install without any front-panel mounting which inconvenient for card swapping, Those with front panel mount were more expensive and their design doesn't match the old computer case, So why not making one from a broken floppy drive bezel.


Left: CF to IDE adaptor.
Right: Old 3.5 floppy drive (Mitsumi) with a mechanical part removed.


CF to IDE Adaptor was mounted with two M3 screws.
Optional: Solder a LED bulb in parallel with an onboard led for an indicator.


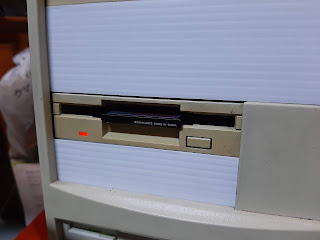
A finished device installed on an old computer. Can you tell which one is a real Floppy drive?


Inserting a CF card.