My original Apple IPad2 10w charger was failed to power on after a long period of unused. Since a USB charger is used in almost every single device these days. It would be good if I can repair this 10w charger and at least repurposing it for charging a small device. Even though it probably not a good idea to use these abused repaired chargers for a brand new IPad anyway.
Warning: This repair is considered experimental and probably potentially unsafe. These charger circuits are main voltage-operated and capacitors may retain charge for some period of time. Don't attempt these repairs unless you know how to work with a high voltage circuit safely.
The hardest part of this repair was to taking this charger apart. Since this charger case is weld together very strong. My initial go-to idea of splitting these cases with a flat head screwdriver was seemed to be impractical. So I have to cut through the seam first with a small Dremel cutting tool. But extreme care has to be taken since these circuit components are very close to the case. The cutting edge was so roughly cut and spaced apart that at first, it seems to be impossible to assembly it back.
This is a Dremel cutting blade I used. Noted that this blade was already bent before.
The top side of the PCB. The component was fitted tightly that there was almost no space left.
The bottom side of the PCB. Noted these cut-out sections of the PCB where a part of the case plastic would go through and provide additional electrical isolation distance.
On this side, there is a low voltage filter capacitor. One of the key failure point in SMPS circuit, But this one use solid capacitor which ESR test was passed.
This is a high voltage filter capacitor which is a culprit in this case. The capacitor failed an ESR meter test.
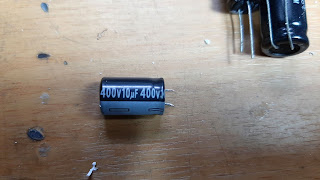
The original capacitor is a 10uF 400v AiSHi 105°C electrolytic capacitor.
But none of my 10uF 400v capacitors would fit in, So I decided to use a 4.7uF capacitor instead which fit perfectly.
Replacing a 10uF with 4.7uF is normally a no-no from a power ripple standpoint. But since I won't be using this adapter for phone/tablet charging. At least these should work.
Placing the PCB back inside the case. Don't forget to put back these insulation tapes.
Since the case was made of polycarbonate and the gap is so wide that glue won't be filling it, So I try a 3D Pen plastic welding technique using an ABS filament, and surprisingly PC plastic is bond together with ABS filament very well.
Generic ABS filament I used to weld these cases.
Finished, Initial testing shows that this 10w charger can power a 4 bank 18650 charger well and also able to power a small LED ring light in my studio without noticeable flicker.


